Try free on Pangolin Cloud
Fastest way to get started with Pangolin using the hosted control plane. No credit card required.
Site to cloud is an advanced remote node configuration available in Pangolin Cloud.
How It Works
- The node routes, it doesn’t just proxy. Gerbil creates the WireGuard interface directly on the host and Docker forwards packets between it and the host’s network, rather than isolating traffic inside a container network namespace.
- The cloud network learns to route to the node. You add a route in your VPC (or other network) so that traffic destined for the Pangolin overlay is sent to the node.
- The node learns to route to the cloud network. You register the VPC’s CIDR on the node so it’s pushed down to your sites as a route.
- Sites route natively. Sites connect with Newt’s native routing mode so the tunnel subnet is a real route on the site’s host, not just an application-layer proxy.
Prerequisites
- A Linux server with Docker and root access, dedicated to running the backhaul node.
- Administrative access to the cloud network you want to bridge (for example, an AWS VPC) so you can edit security groups, route tables, and instance settings.
Enable IP Forwarding on the Host
Because the node forwards packets between the WireGuard tunnel and the host network instead of only terminating them, the host must have IP forwarding enabled.net.ipv4.ip_forward=1 to /etc/sysctl.d/99-pangolin-backhaul.conf.
Docker enables forwarding in its own iptables rules by default, but if you’ve disabled Docker’s iptables management, or packets are still being dropped, allow forwarded traffic through Docker’s chain in /etc/docker/daemon.json:
/etc/docker/daemon.json
Deploy the Node with Host Networking
The standard node install runs Gerbil and Traefik on a bridge network, with Traefik sharing Gerbil’s network namespace. For backhaul, all three services run withnetwork_mode: host instead. This gives Gerbil direct access to the host’s network stack and routing table, which is required for it to create routes for the subnets you register instead of only handling its own tunnel traffic.
docker-compose.yml
With
network_mode: host, containers bind to ports directly on the host, so there’s no ports mapping and no network_mode: service:gerbil on Traefik like there is in the standard install. Gerbil and Traefik reach each other and Pangolin over localhost.Configure the Node
Theconfig.yml for a backhaul node uses the same fields as any remote node, mounted at config/config.yml:
config/config.yml
Configure Traefik
Traefik’s config is largely the same as a standard node, withtrustedIPs opened up to accept the proxy protocol header from Gerbil on the host network:
config/traefik/traefik_config.yml
Configure the Cloud Network
This section uses AWS as an example, but the same steps apply to any VPC-style network: the node needs to be allowed to receive and forward traffic for the whole network, and the network needs a route pointing back at the node.Allow all traffic into the node
The node is acting as a concentrator for the whole network, not just serving its own ports, so its security group must accept all traffic from the VPC’s CIDR. Otherwise the security group blocks the inbound traffic it’s meant to forward.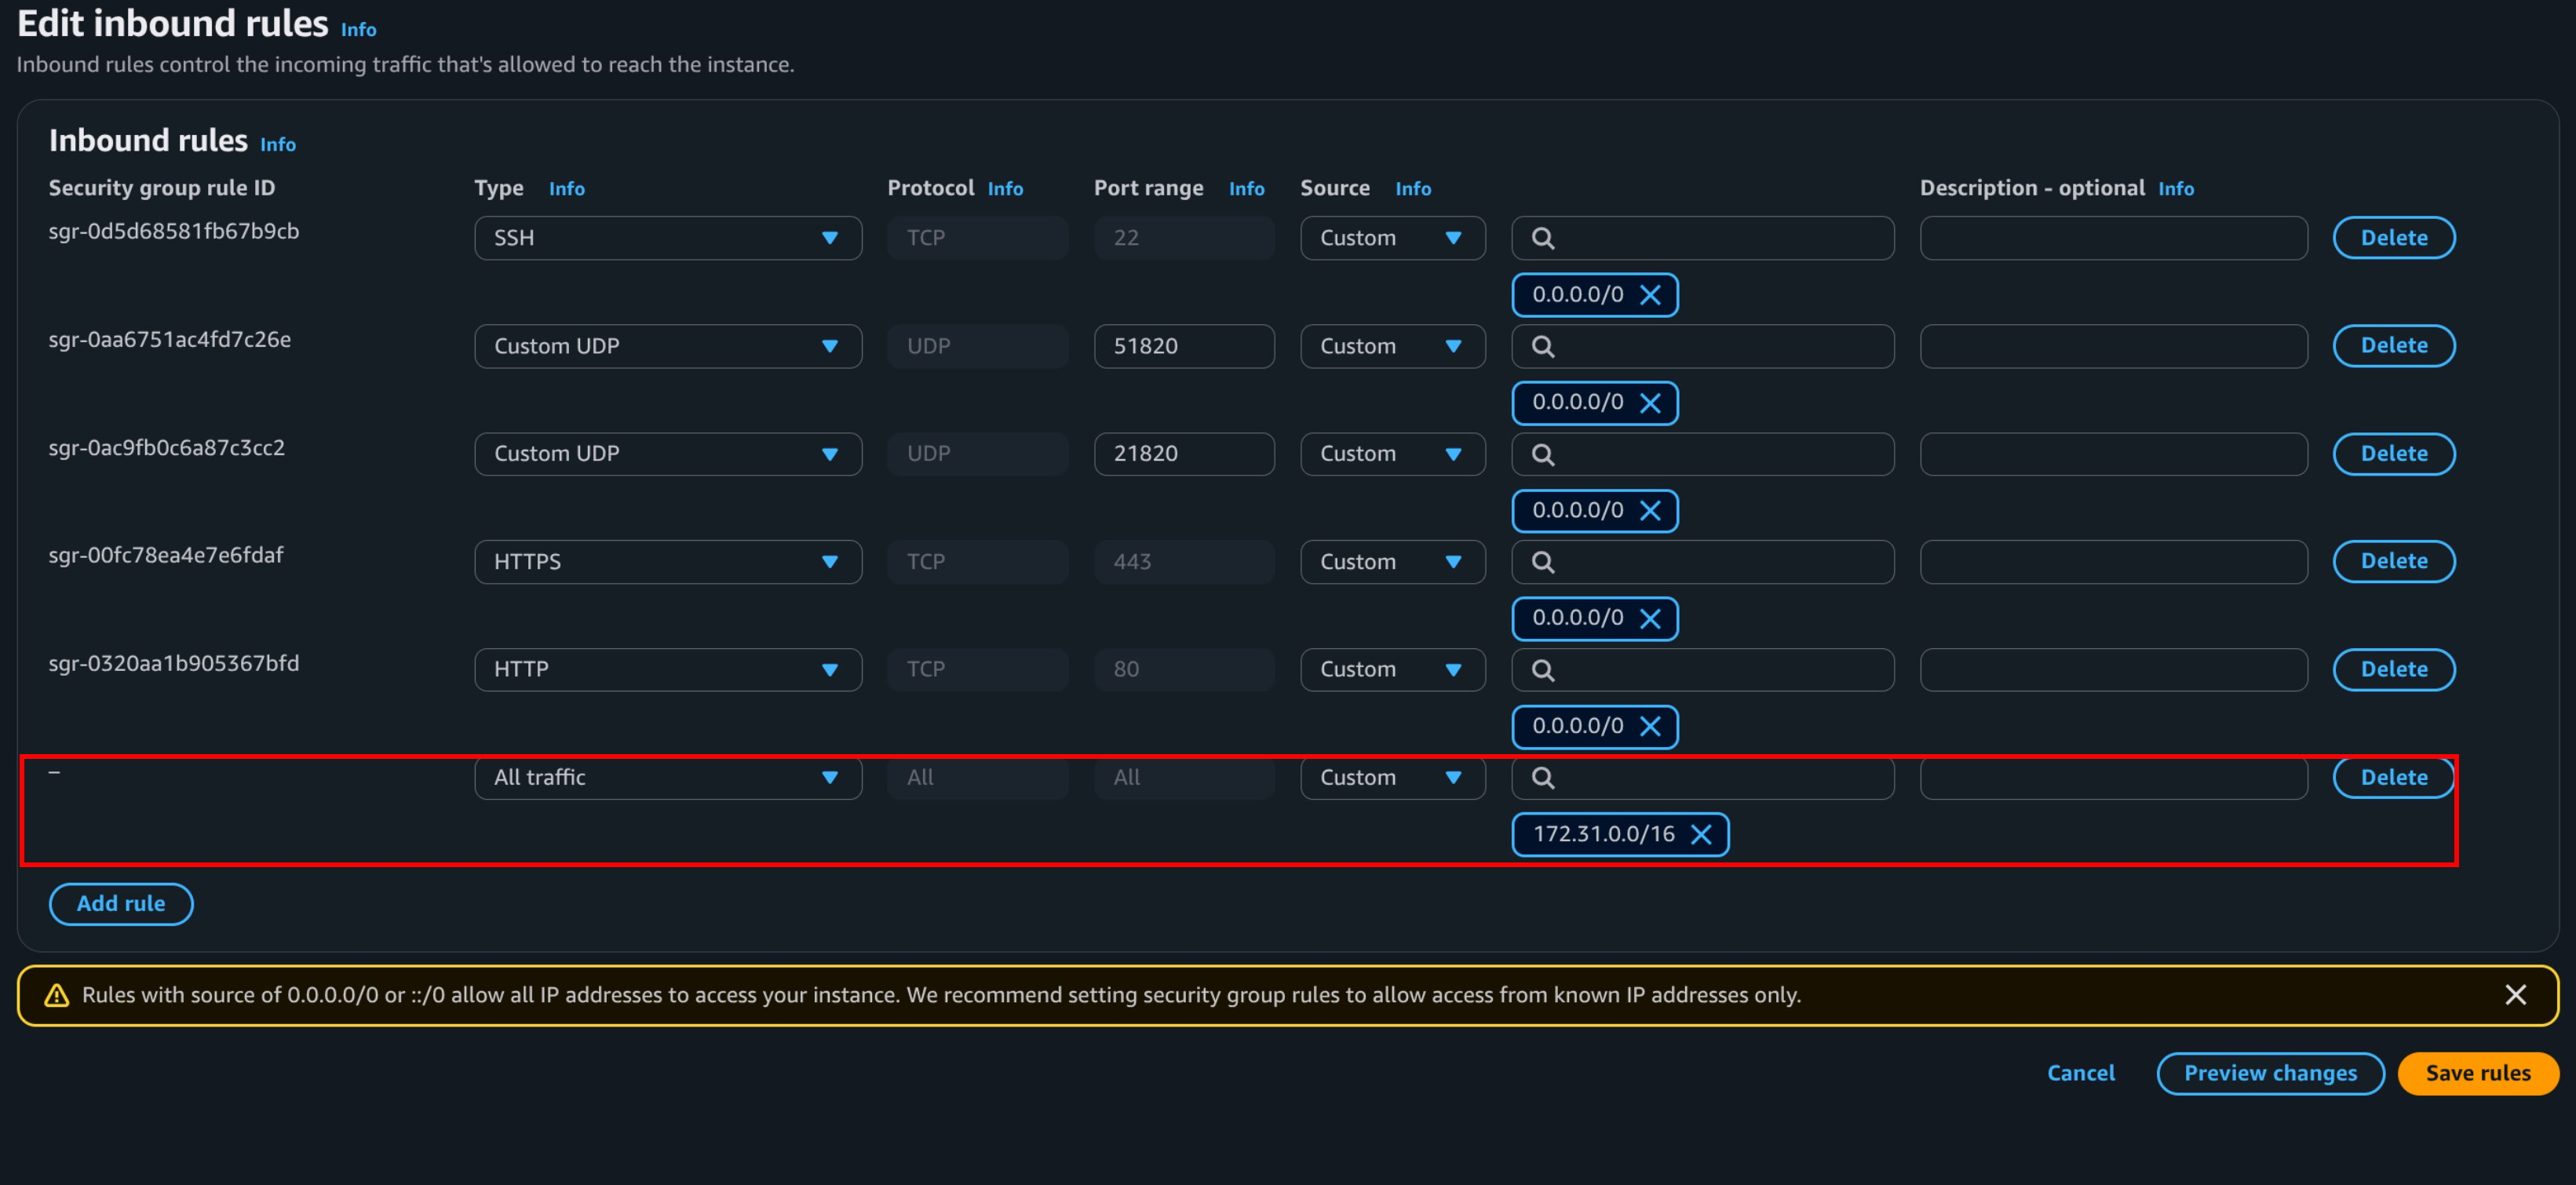
Route the Pangolin overlay through the node
Add a route in the VPC’s route table for the WireGuard overlay subnet assigned to your node (shown as the node’s Address on its page in the Pangolin dashboard), targeting the node’s instance or network interface. This tells the rest of the VPC to send anything destined for the Pangolin overlay — other sites and clients — to the node.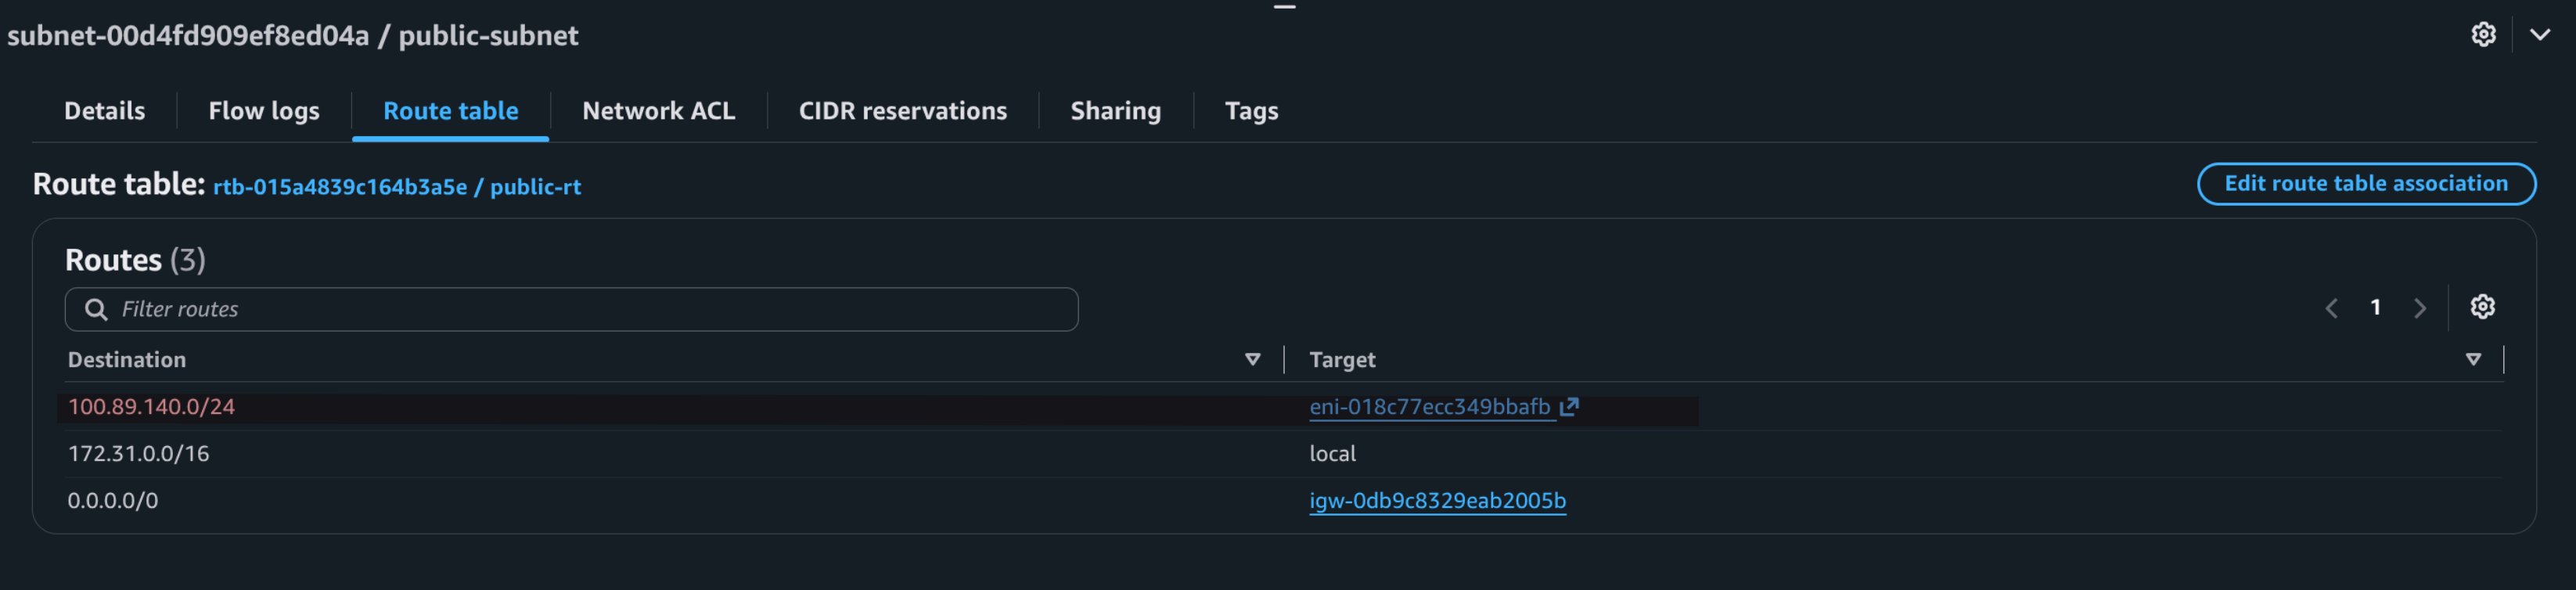
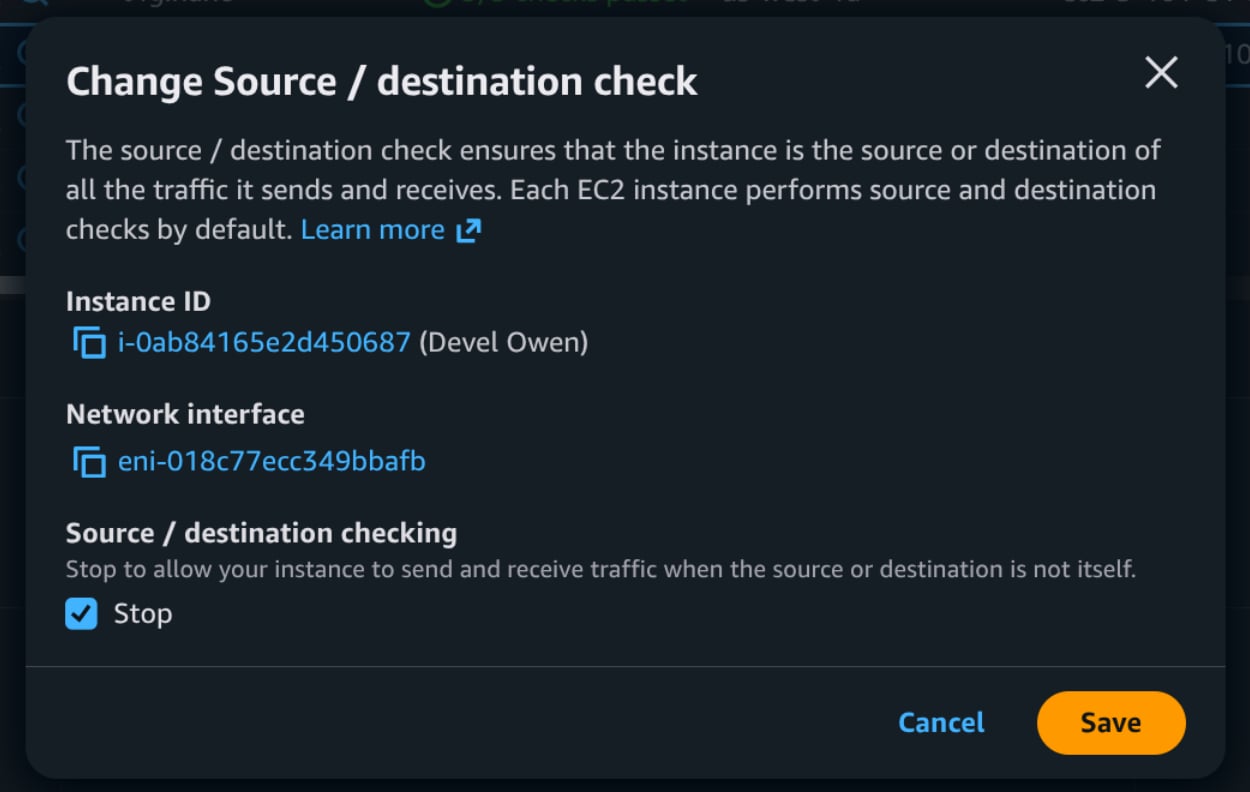
Disable source/destination check
By default, AWS drops any packet where an instance isn’t the source or destination, which would silently break a node that’s forwarding traffic on behalf of others. Disable the source/destination check on the node’s instance so it’s allowed to route traffic that isn’t addressed to itself.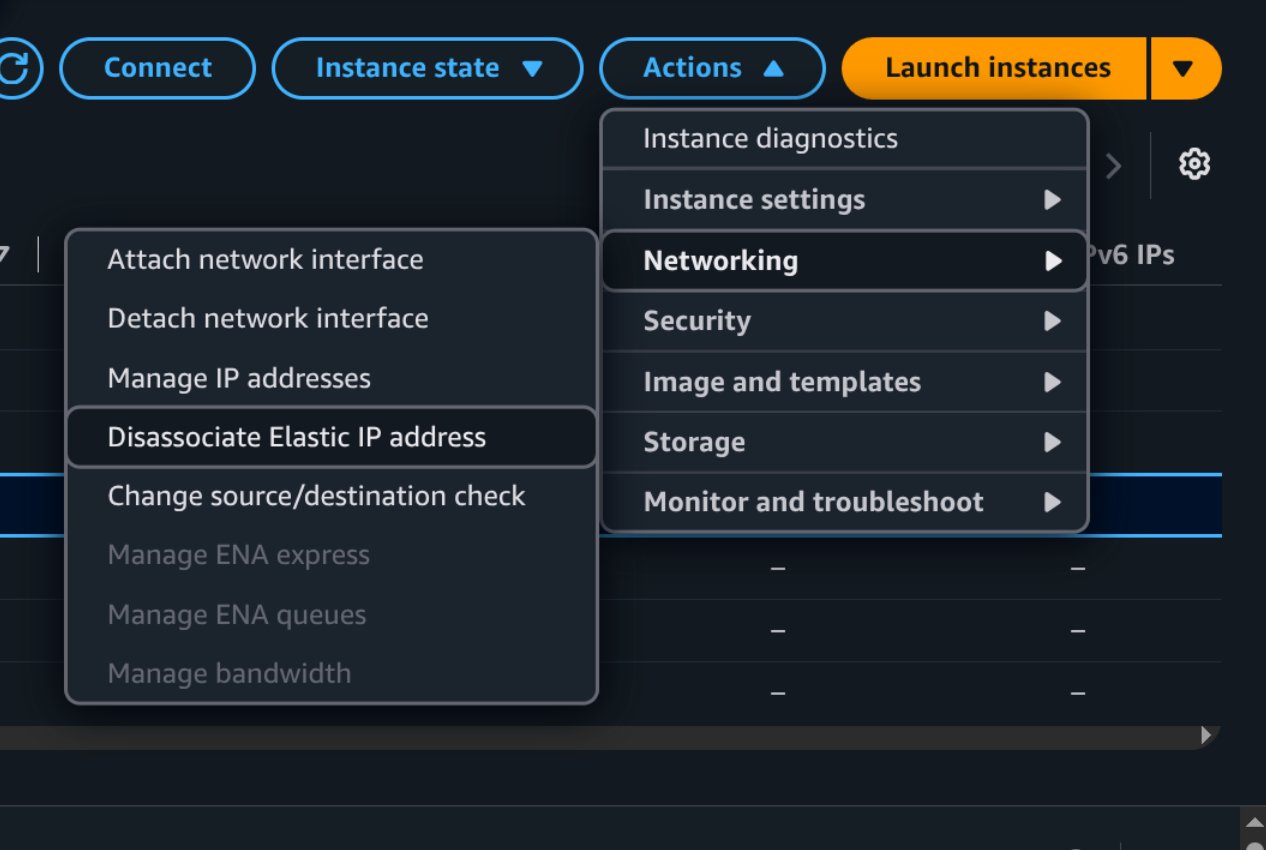
Advertise the VPC subnet on the node
In the node’s settings in the Pangolin dashboard, add the VPC’s CIDR (for example, 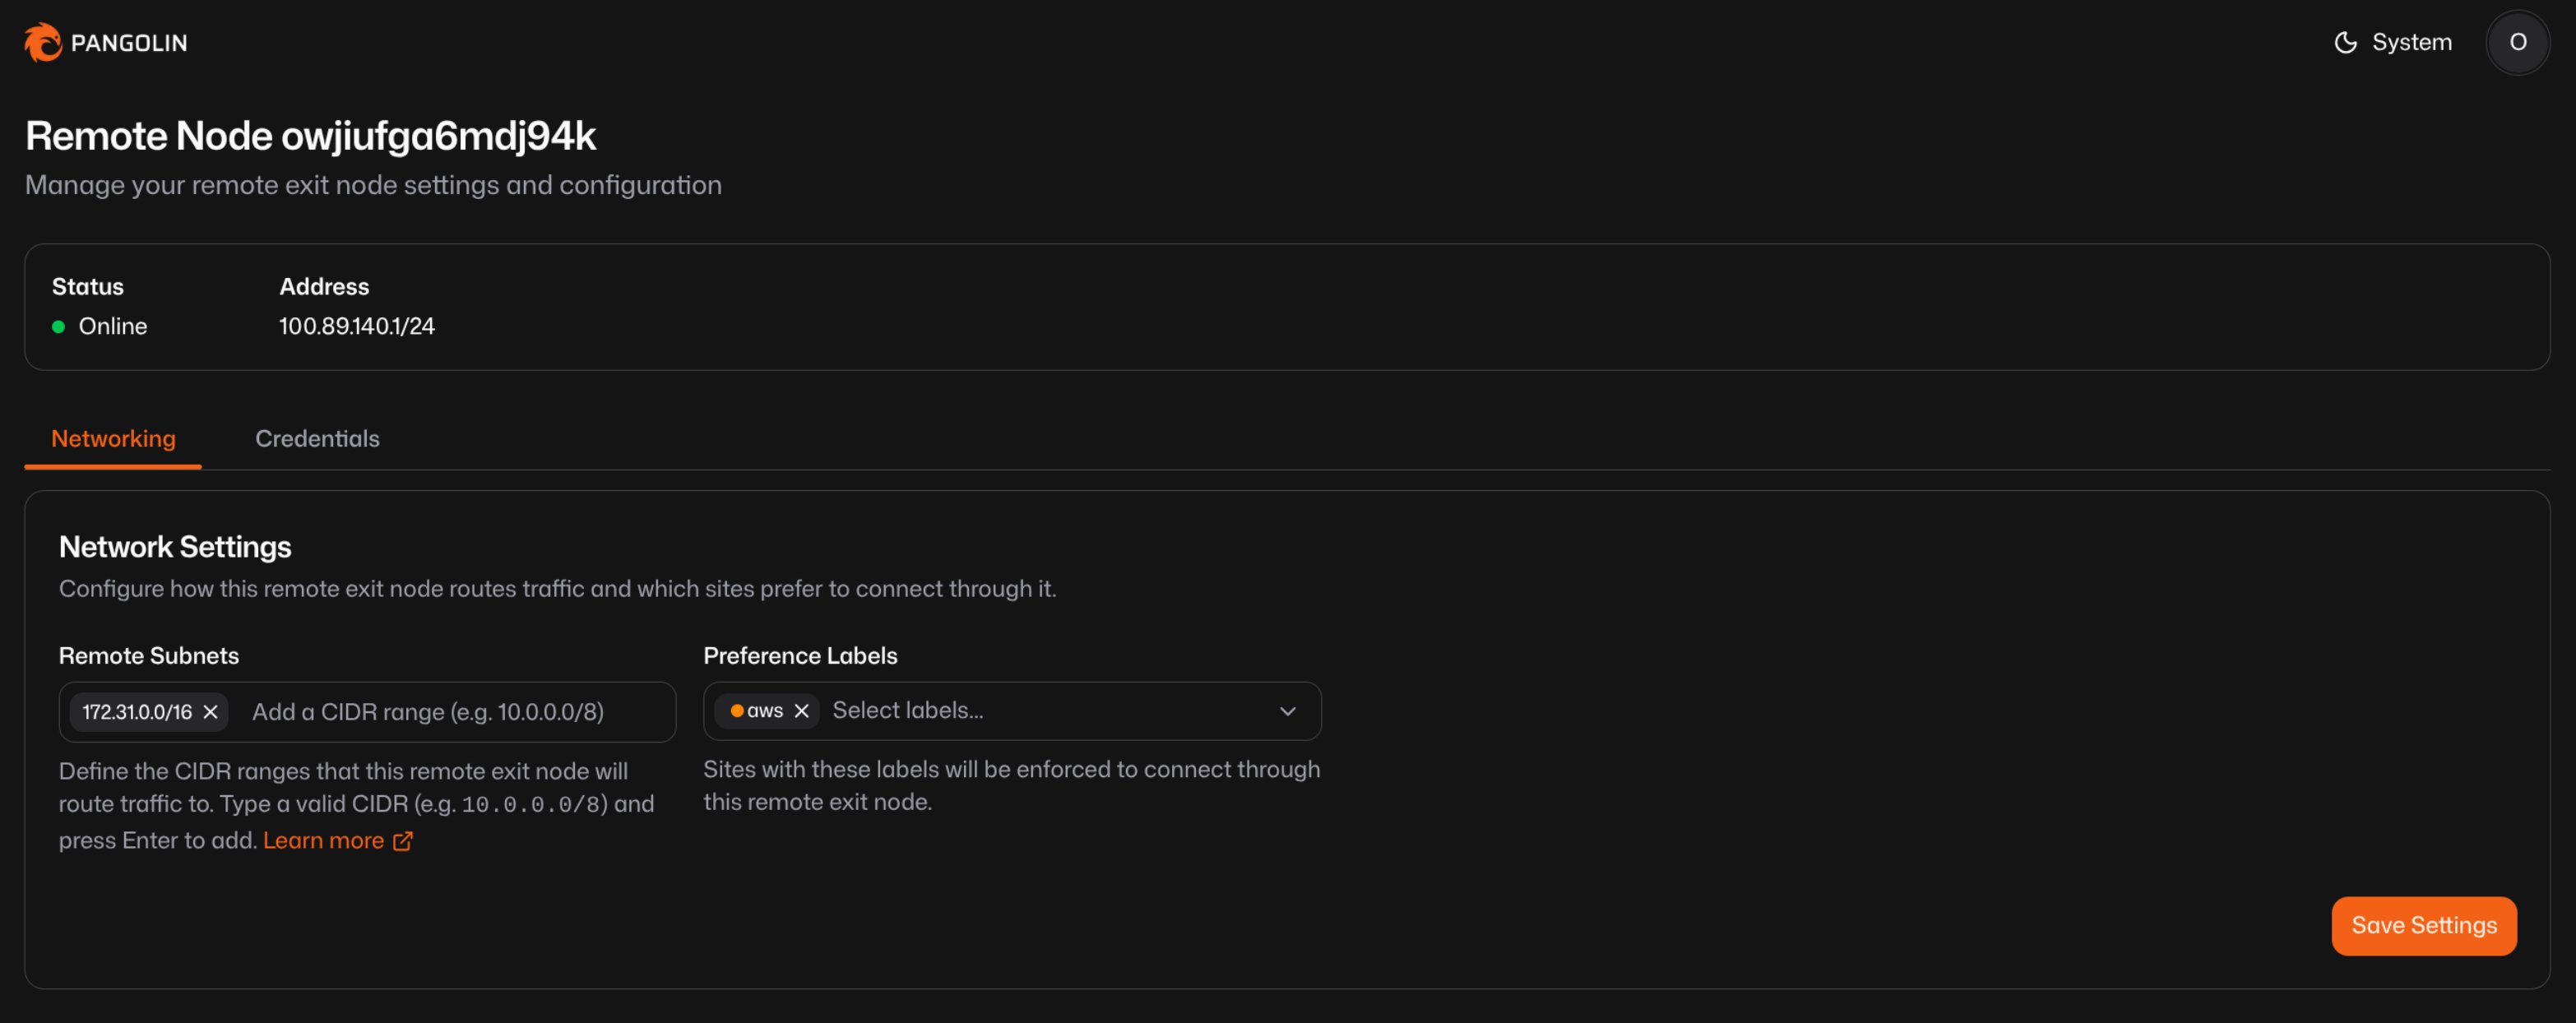
172.31.0.0/16) to Remote Subnets under the Networking tab. This is pushed down to your sites as a route, so they know to send traffic for that subnet through this node’s tunnel.You can also set Preference Labels on the node and apply matching labels to sites, which enforces that those sites connect through this remote node specifically. This is useful once you have more than one node or point of presence and want particular sites to always backhaul through this one.Enable Native Routing on Your Sites
For the VPC and a site’s network to route to each other, the tunnel needs to be a real route on the site’s host, not just something Newt proxies at the application layer. Start Newt with--native-main so it creates the network interface and routes directly on the host:
nativeMain in the Newt client’s config.json instead:
%PROGRAMDATA%/newt/newt-client/config.json
Resolving a Site’s Address Directly
If something outside of Pangolin’s normal resource routing needs to reach a site directly, for example a static route configured elsewhere in your network, you can resolve<newtId>.site.pangolin.net to get the site’s current routable address.
This is useful with backhaul because a site’s traffic can move between exit nodes if one becomes unavailable. The DNS record always follows the site to whichever node it’s currently connected through.
Expect a short gap in resolution when a site moves between nodes while the DNS record updates.