Try free on Pangolin Cloud
Fastest way to get started with Pangolin using the hosted control plane. No credit card required.
Why provisioning keys exist
As described in Site credentials, each Pangolin site authenticates with an ID and secret (random strings you get when a site is first created) plus an endpoint pointing at your Pangolin server. That model is simple for a handful of sites, but it breaks down quickly when you must issue and distribute unique credentials for many machines. IoT and edge fleets are the classic case: hundreds or thousands of devices each need their own site identity. Before provisioning keys, you typically scripted against the API to mint an ID-secret pair per device, then pushed those secrets through your device-management or OTA layer so each unit could connect. That works, but it multiplies secret-handling paths and makes rotation and auditing harder. The same friction shows up in other scenarios:- Golden images and OS images: You want one trusted image (or cloud-init payload) shared across a class of machines, not a unique secret baked into every build artifact. A single provisioning key in the image, or injected at first boot, lets each instance obtain its own credentials the first time Newt starts.
- Scripted and CI-driven installs: Ansible, Terraform, cloud-init, or installer scripts can drop the same provisioning key everywhere (or fetch it from a vault once) instead of coordinating “create site N, copy credentials to host N” for every node.
- Developer and lab environments: Spin up VMs or containers repeatedly without clicking through the dashboard for each site; tear them down and provision again with bounded keys (usage limits and expiry; see below).
- MSP and multi-customer rollouts: Standardize your onboarding bundle (endpoint + provisioning key + blueprint) while still giving each customer site isolated credentials after exchange.
How provisioning works
You can supply the provisioning key in either of two ways: 1. Config filePut the key in a JSON config file in a
provisioningKey field (the value is the key string from Pangolin, often shown with an spk prefix) and point Newt at that file:
Pass the key with
--provisioning-key instead of storing it in the file. You still use --config-file so Newt has a path to write and persist settings; see Configure Sites for the rest):
id and secret into that config file. On later runs, Newt uses those credentials and ignores the provisioning key (CLI flag or file field), because valid ID and secret are already present. If you used provisioningKey in JSON, that entry is removed when the file is updated, so the long-lived token is not left on disk. If you pass --provisioning-key instead, Newt does not write that key into the config file, but anything that launched Newt with the flag may still contain it.
From there Newt authenticates over the websocket, optionally applies a blueprint if you passed one, then brings the tunnel online. The high-level sequence is summarized below.
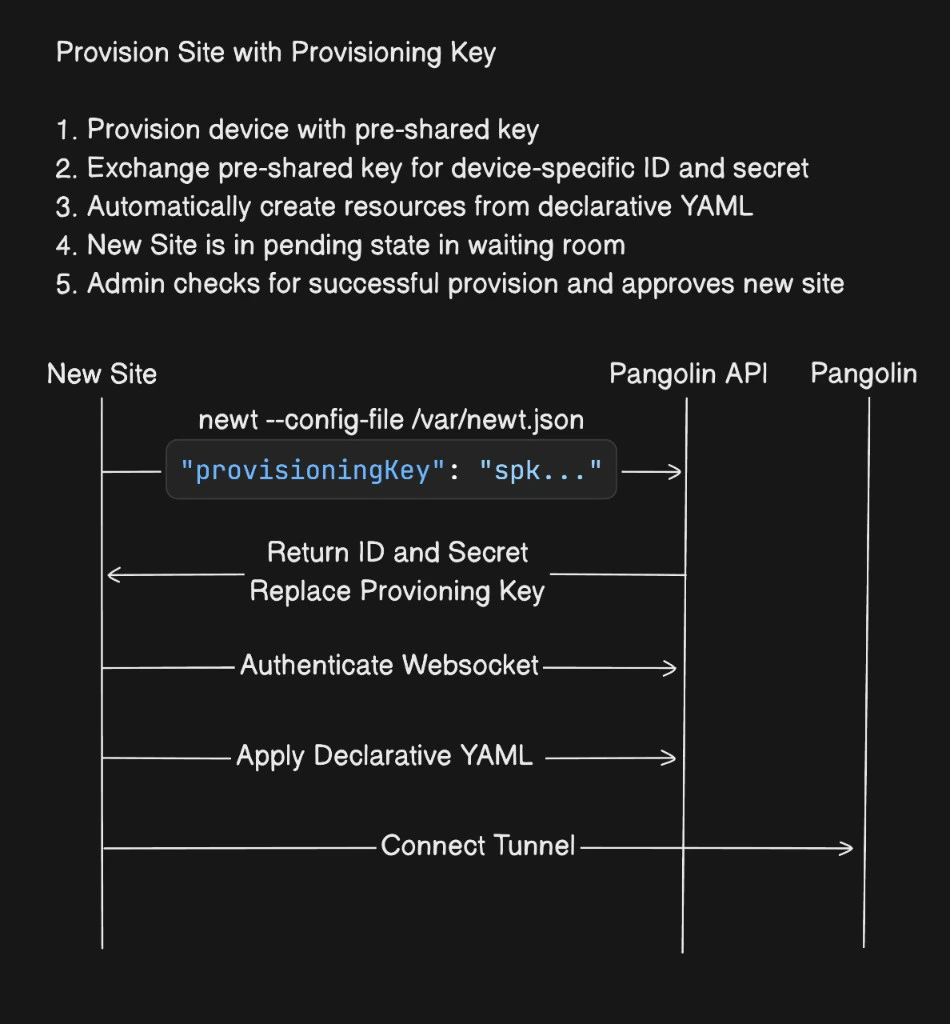
Pangolin Blueprints are not required when using provisioning keys. You can provision with the key only and manage resources in the dashboard afterward. Blueprints are optional but convenient when you want resources and settings created automatically from YAML as soon as the site connects.
--provisioning-blueprint-file vs --blueprint-file
When you run Newt with a provisioning key, you can attach a blueprint YAML file in two different ways:
| Flag | Behavior |
|---|---|
--blueprint-file | Declarative. The blueprint is the ongoing source of truth. Newt keeps applying it, and changes you make in the dashboard can be overwritten the next time the blueprint is applied. |
--provisioning-blueprint-file | Imperative (bootstrap only). The file is applied once, at provisioning time. After that, Newt does not keep reapplying it. You can edit resources in the dashboard and those edits will not be overridden by that YAML on later runs. |
--provisioning-blueprint-file when you want automation to create an initial set of resources (for example from a fleet template) but you intend to manage or tune them in the UI afterward. Use --blueprint-file when you want the file to remain authoritative, the same as on a normal site without provisioning keys.
Blueprint example and environment templating
Blueprints can reference environment variables using{{env.VARIABLE_NAME}} syntax. At apply time, those placeholders are filled from the process environment running Newt (for example a serial number, hostname, or customer slug exported before start). That lets one blueprint drive many sites: each host sets SERIAL_NUMBER, CUSTOMER_ID, or similar, and the resolved YAML defines unique site names, domains, or role assignments.
Below, {{env.SERIAL_NUMBER}} ties the private resource’s site field and the public resource’s hostname to the same per-device identity:
Optional site name (--name)
You can pass --name to Newt when provisioning so the new site gets a specific name. The value supports the same {{env.VARIABLE_NAME}} templating as blueprints: placeholders are expanded from the environment where Newt runs before the site is created (for example per-device serials or hostnames).
--name, Pangolin assigns a random animal-based name, which you can change later in the dashboard. Explicit or templated names help when your automation or blueprint references the site by a stable label.
Limits, expiry, and security model
Provisioning keys support a maximum usage count and an expiration time. For example, to roll out 250 devices over a week, set max usage to250 and expiry to one week. When either limit is reached, the key becomes inactive and the server rejects further exchange attempts.
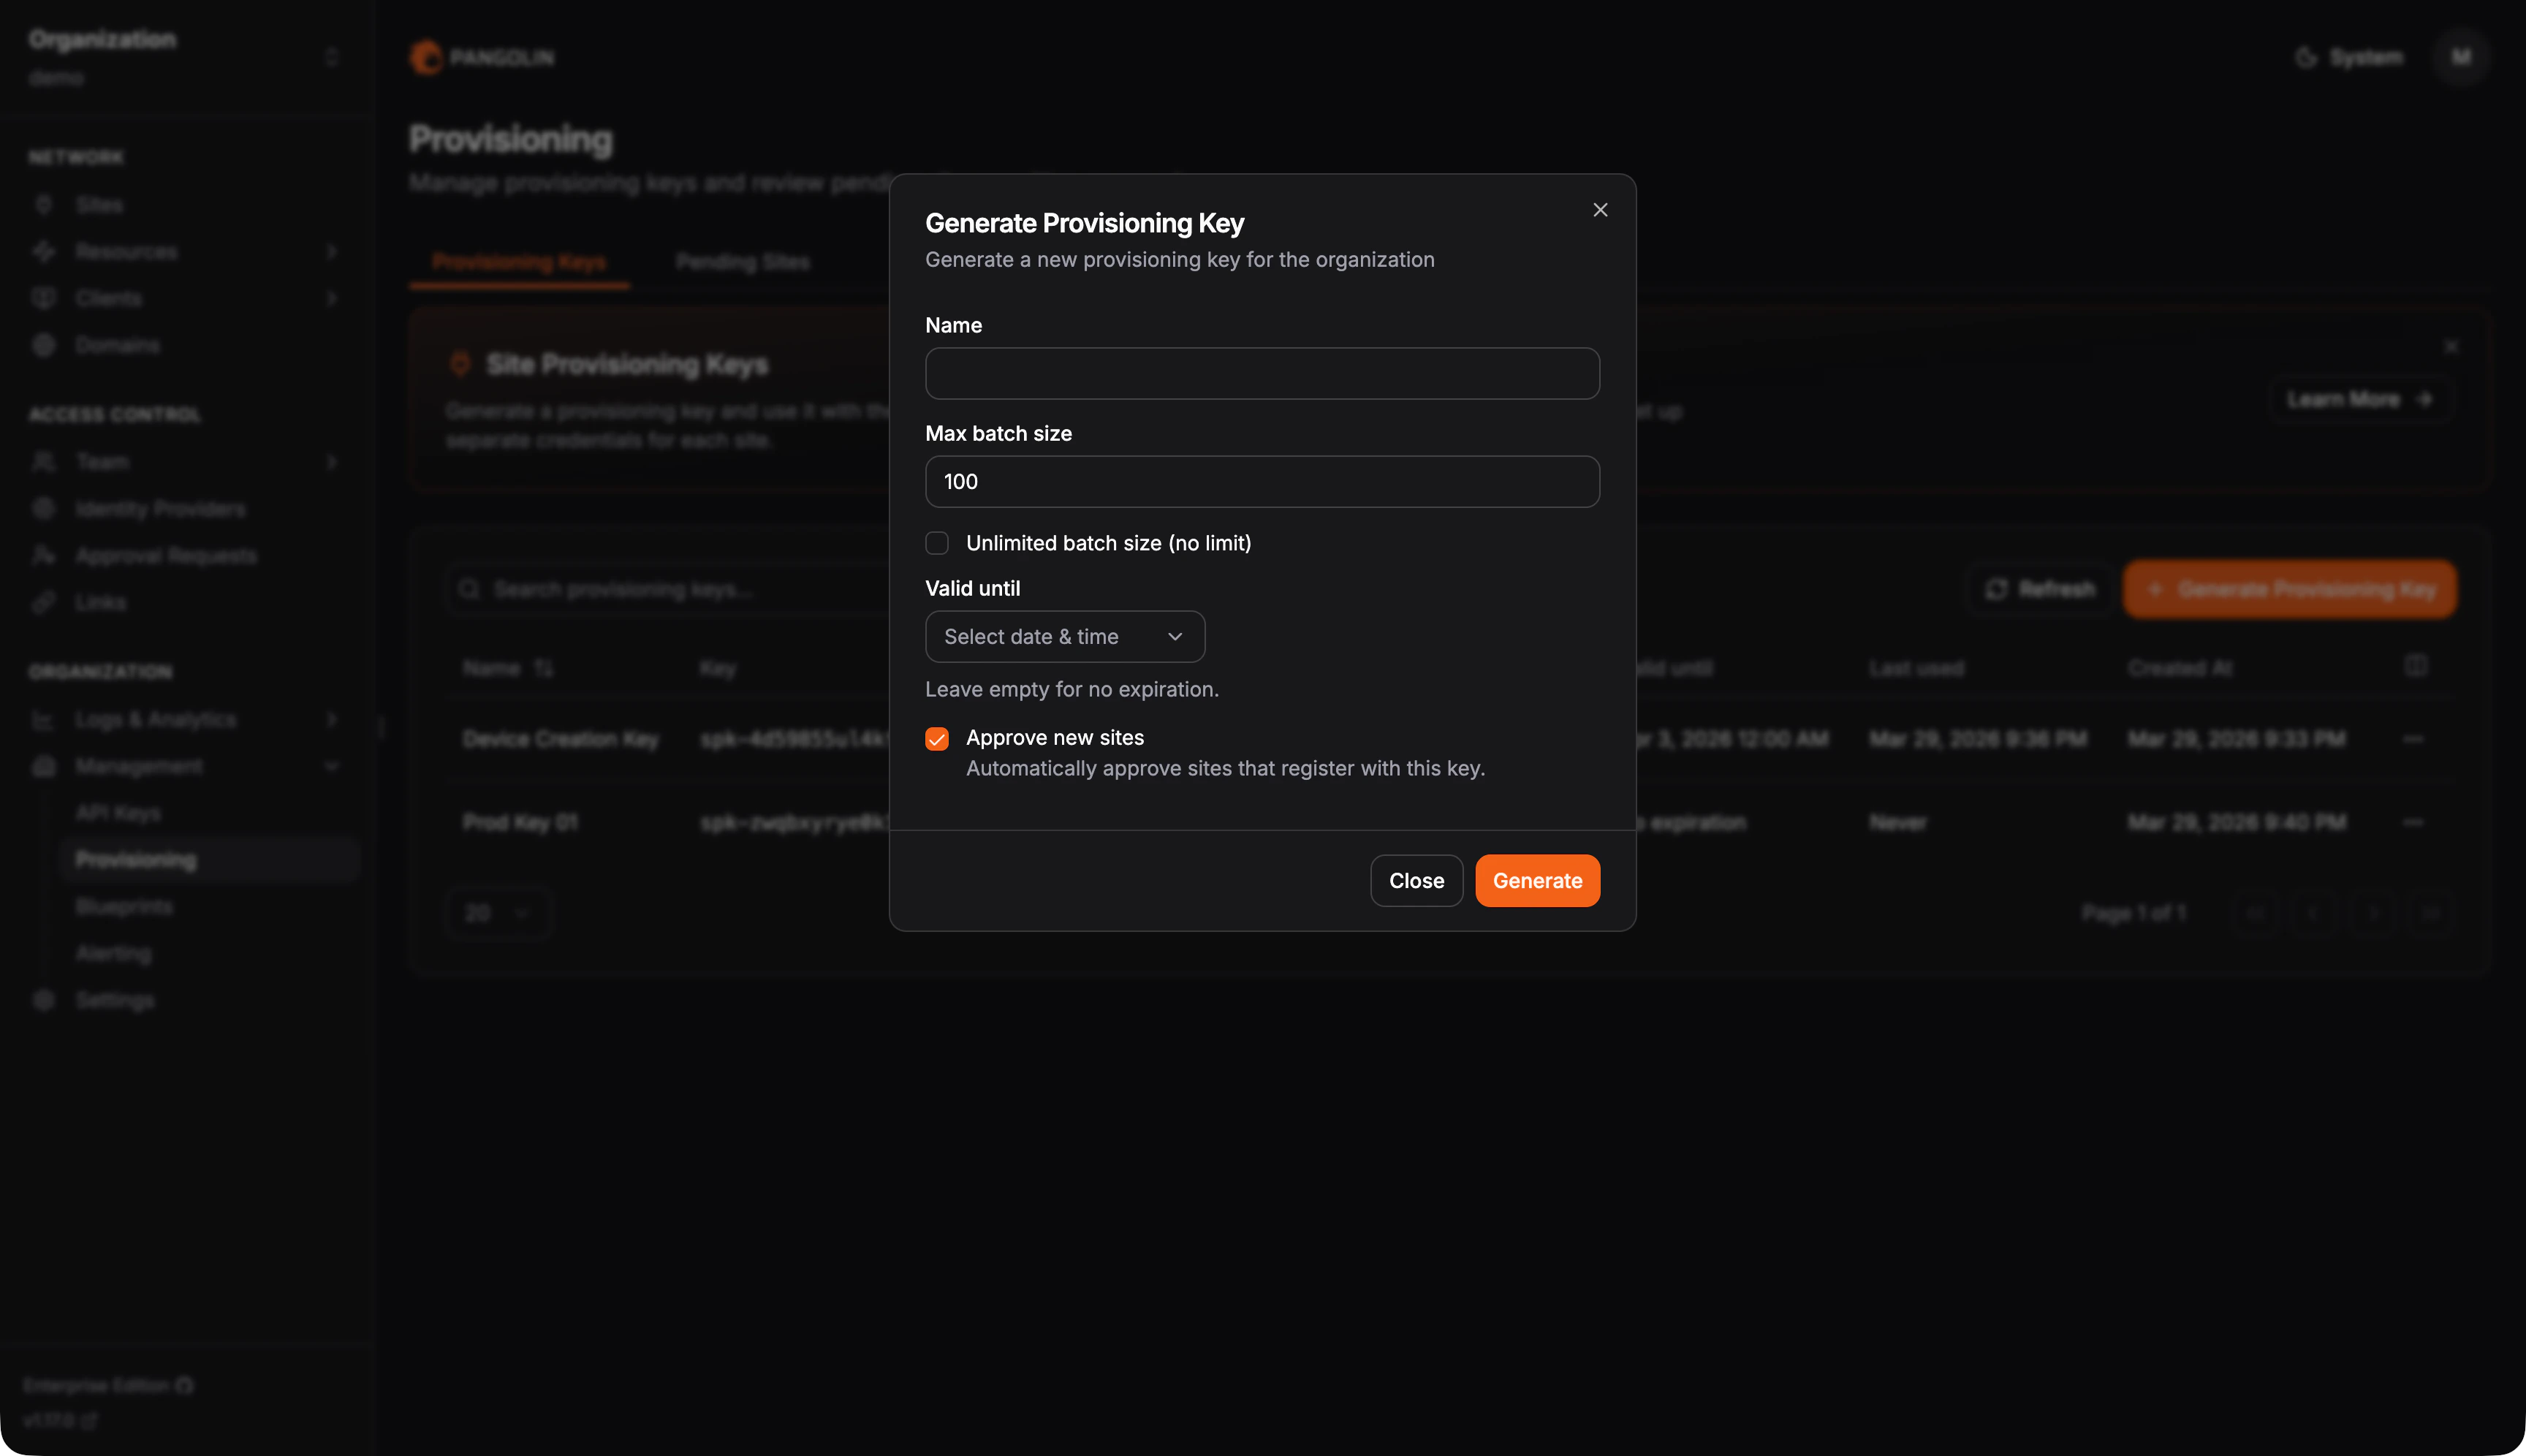
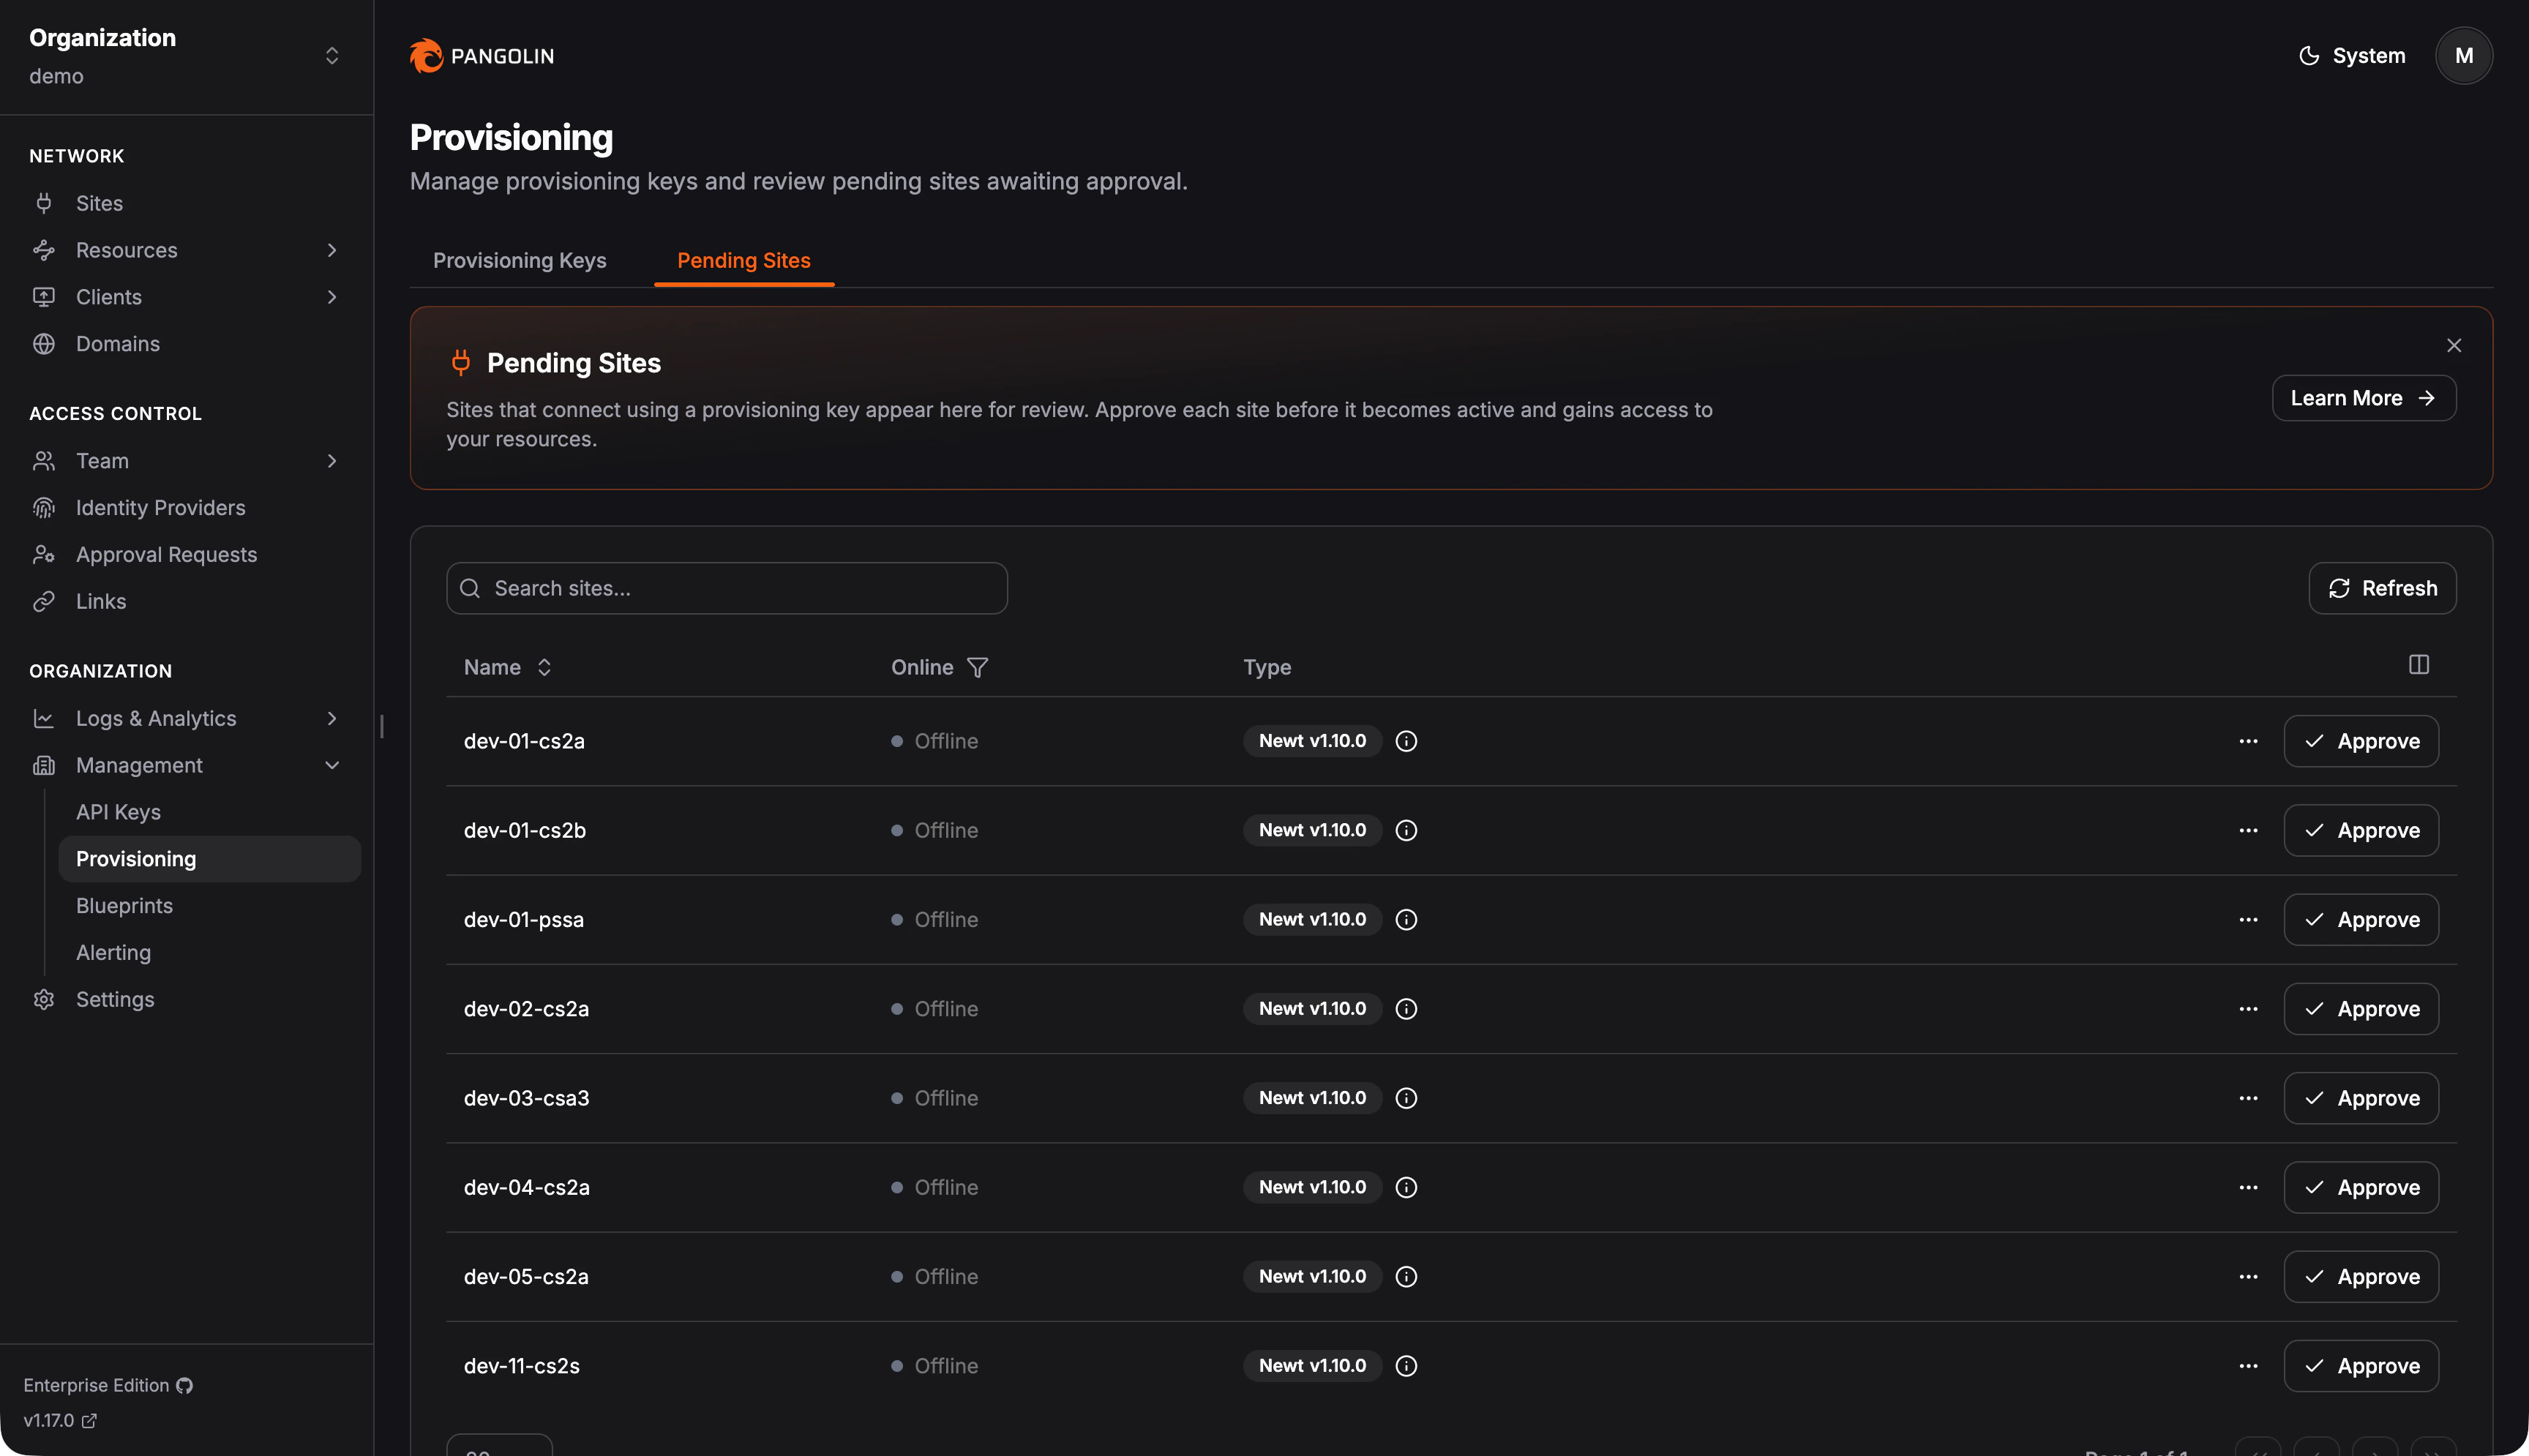
Creating a key and pending approval
In the Pangolin admin UI, create a provisioning key from the provisioning settings (including usage and expiration as needed). The flow is illustrated below.